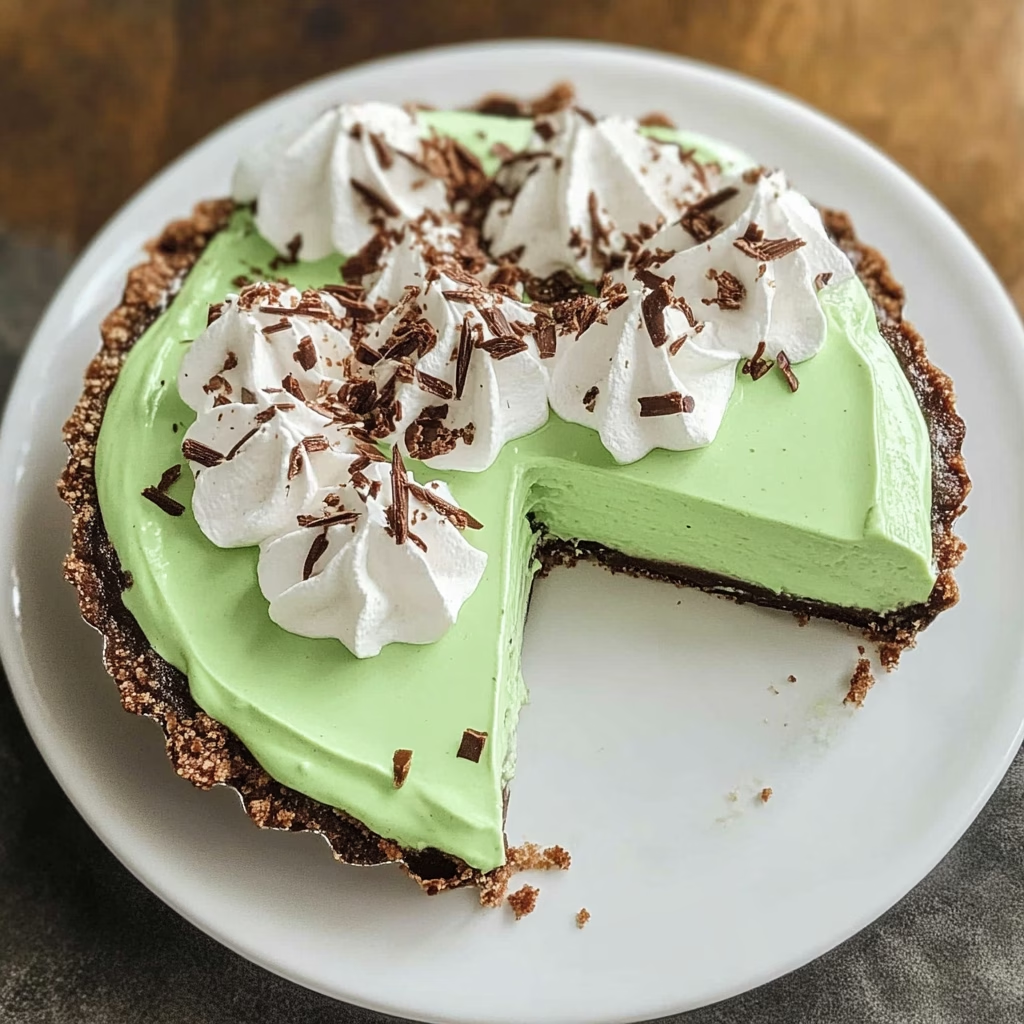
Oh, have I got a treat for you today! I can’t wait to share my beloved **No Bake Grasshopper Pie** recipe. This pie is not only a feast for the eyes with its stunning mint green filling, but it also offers a delightful combination of creamy textures and chocolatey goodness that is simply irresistible. Every bite feels like a bite of summertime!
I remember the first time I tried a Grasshopper Pie; it was at a family gathering, and I was instantly hooked. The way the creamy mint filling contrasted with the rich chocolate Oreo crust seemed like a magical experience! I knew then that I had to recreate it in my own kitchen. Now, every time I make this pie, it brings back those fun memories and light-hearted laughter. Plus, it’s a no-bake dessert, which means I can whip it up without breaking a sweat!
What’s in Grasshopper Pie?
Let’s break down the delicious ingredients that come together to create this dreamy dessert.
Oreo Cookies: These chocolatey treats form the base of our pie crust. I always go for the classic Oreo because it packs the best flavor. If you don’t have Oreos on hand, any chocolate sandwich cookie can work too.
Unsalted Butter: We melt this and mix it with the crushed Oreos to create a rich, sticky crust. It gives the crust that perfect firm yet crumbly texture.
Cream Cheese: This is the creamy heart of the pie! It creates a luscious filling I can’t get enough of. Make sure to use the block kind for the best results.
Powdered Sugar: Also known as confectioner’s sugar, this sweet ingredient helps to balance the cream cheese’s tanginess. It’s what transforms our filling into a smooth, delightful treat!
Cool Whip: This whipped topping lightens up our filling and makes it wonderfully fluffy. If you want to make it from scratch, you can whip heavy whipping cream to soft peaks as a replacement.
Peppermint Extract: This is the secret ingredient that gives our pie that refreshing minty punch. A little goes a long way, so don’t overdo it!
Green Food Coloring: While optional, a few drops of this vibrant color make our pie visually appealing and fun, especially for the folks who love some color in their desserts.
Is Grasshopper Pie Good for You?
Honestly, I can’t say this pie is a health food, but it has its perks!
Cream Cheese: It provides a nice dose of calcium, but being a dairy product, it should be enjoyed in moderation, especially if you’re watching your cholesterol.
Oreo Cookies and Butter: Though delicious, they are high in sugar and saturated fats, so it’s best to enjoy this pie as an occasional indulgence.
I like to think of this dessert as a treat for celebrations or when I’m feeling a little nostalgic! Just remember, balance is key when it comes to sweets.
Ingredients
– 24 Oreo cookies (for the crust)
– ½ cup unsalted butter, melted
– 8 oz cream cheese, softened
– 1 cup powdered sugar
– 1 ½ cups Cool Whip (or homemade whipped cream)
– ½ teaspoon peppermint extract
– A few drops of green food coloring (optional)
**Servings:** This recipe serves about 8-10 people, depending on how generous (or not) you’re feeling with your slices!
How to Make Grasshopper Pie?
1. **Crush the Oreos:** Start by placing the Oreo cookies in a food processor and pulse them until they turn into fine crumbs. Alternatively, you can put them in a resealable plastic bag and use a rolling pin to crush them with a bit of muscle.
2. **Combine with Butter:** In a mixing bowl, stir the crushed Oreos with the melted butter until everything is well coated and looks like wet sand.
3. **Form the Crust:** Press the Oreo mixture firmly into the bottom and up the sides of a pie dish. Make sure it’s compact to hold well.
4. **Chill the Crust:** Place the crust in the refrigerator to chill while you make the filling. This usually takes about 30 minutes.
5. **Make the Filling:** In a large bowl, beat the softened cream cheese with an electric mixer until creamy and smooth. Gradually add the powdered sugar, mixing until combined. Then, gently fold in the Cool Whip until it’s all blended and fluffy.
6. **Add Flavors and Color:** Stir in the peppermint extract and the green food coloring until your desired color is achieved.
7. **Pour Filling into Crust:** Take your chilled crust out and pour the mint filling into it, smoothing the top with a spatula.
8. **Chill Again:** Cover the pie with plastic wrap and chill it in the refrigerator for at least 4 hours or until set.
9. **Serve:** When you’re ready to enjoy, you can top it with some extra Cool Whip and crushed Oreos for an extra special touch!
Minty Variations and Toppings
If you’re looking for some fun tweaks to this classic, here are a few ideas:
– Add a layer of chocolate ganache over the cool whip topping for an added rich flavor.
– Top with shaved chocolate or chocolate curls for a more elegant presentation.
– For a less sweet version, substitute part of the powdered sugar for crushed mint candies to give it an added crunch!
I can’t help but smile thinking about how everyone will enjoy this pie. It’s truly a creamy, minty delight that brings joy to all who taste it. So go ahead, pull out your mixing bowls, and treat yourself (and your loved ones) to this lovely dessert. I can’t wait to hear how yours turns out! Enjoy every delicious bite!


