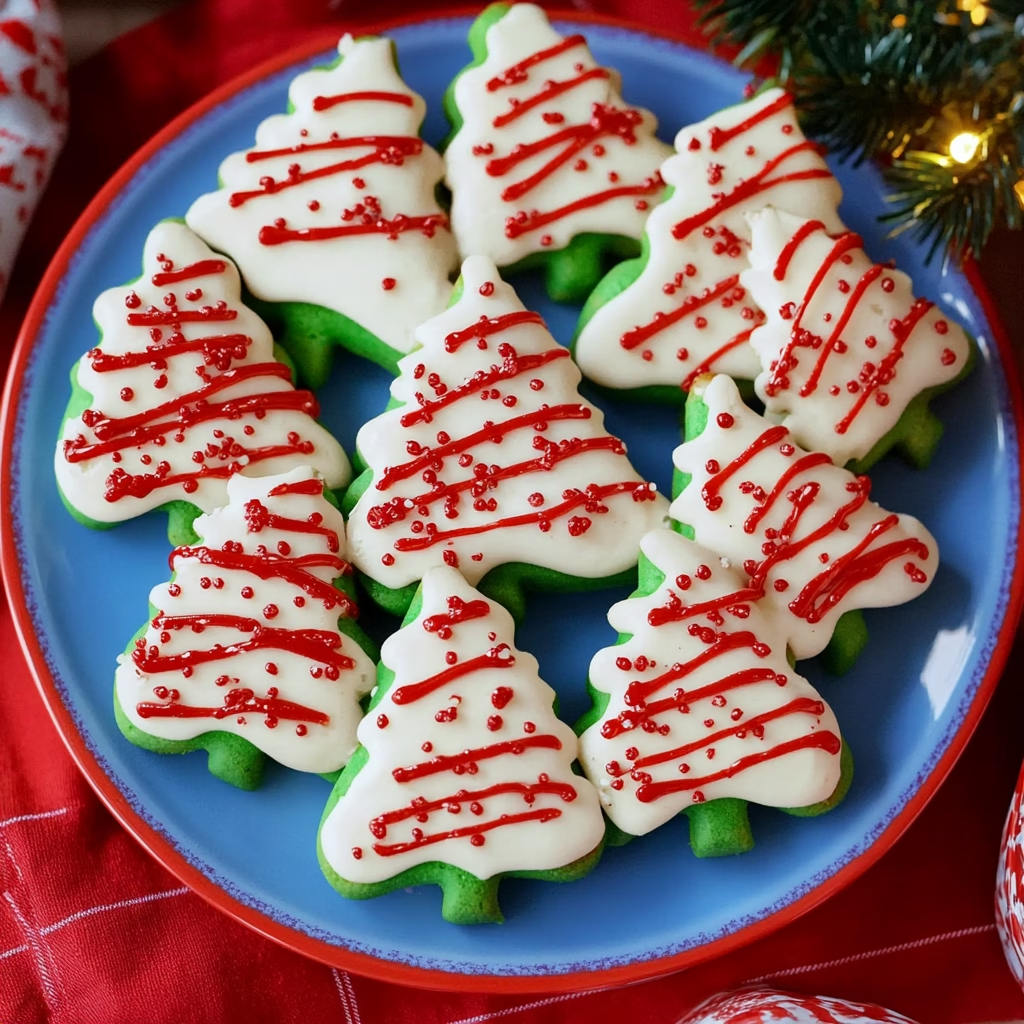
Oh my goodness, you guys! I am so excited to share this recipe for Homemade Little Debbies Tree Cakes. Seriously, these little nuggets of joy are like a Christmas miracle wrapped in a soft, delicious cake. I remember making these with my late grandmother every holiday season, turning our kitchen into a little festive wonderland filled with laughter, flour everywhere, and, of course, a few disasters along the way! But you know what? It always ended with the sweet satisfaction of biting into our delightful creation. Let’s make some memories of our own with this yummy treat!
What makes these tree cakes so special? Well, aside from being ridiculously cute, they are packed with a delicious vanilla flavor and a dreamy sweet cream filling. Plus, they look fabulous on any holiday dessert table! So grab your tree-shaped mold, and let’s dive into this joyous journey of baking!
What’s in Homemade Little Debbies Tree Cakes?
All-Purpose Flour: This is the base of our cake, giving it that lovely, fluffy texture. I usually buy the unbleached kind for a bit of extra flavor.
Sugar: A generous amount of good ol’ sugar is key to sweetness and making the cake tender.
Baking Powder: This little magic powder is what’ll make our cakes rise beautifully, ensuring they are light and fluffy.
Salt: Just a pinch! It balances the sweetness and enhances the flavor of the cake.
Unsalted Butter: I love using high-quality, unsalted butter for that rich flavor. Make sure it’s softened so it creams nicely with the sugar.
Eggs: They give our cake structure and richness. I always use large eggs right out of the fridge.
Milk: Whole milk keeps our cake nice and moist. You can substitute with almond milk if preferred for a lighter option.
Vanilla Extract: The star of the show! A splash of pure vanilla extract adds that classic flavor we all know and love.
White Chocolate or Vanilla Frosting: This icing is what seals the deal – it covers our cakes in creamy goodness.
Green Sprinkles: To transform our cake into a glorious Christmas tree, these little sprinkles add a festive touch.
Red Icing: This will be used for decorations on our cake, kind of like the ornaments on a Christmas tree!
Will You Make My Tree Cakes? Is It Good for You?
Let’s talk about health perks! While these delightful cakes are certainly a treat and not exactly a health food, there’s something special about homemade goodies: I know exactly what goes into them. For example, using fresh and quality ingredients means we have a cake made from scratch with love!
All-Purpose Flour: Provides essential carbs, though it’s best enjoyed in moderation.
Butter: While it’s high in saturated fats, it also adds essential vitamins. Just remember, moderation is key!
And hey, if you’re looking to balance things out, I’ve paired these with a healthy green smoothie in the past. It’s a great way to make it feel like you’re winning at life during the holidays!
Let’s Gather and Bake: Ingredients List
Here’s what you’ll need to whip up about 8 delicious little tree cakes:
– 2 cups all-purpose flour
– 1 ½ cups sugar
– 1 tablespoon baking powder
– ½ teaspoon salt
– ½ cup unsalted butter, softened
– 3 large eggs
– 1 cup whole milk
– 2 teaspoons vanilla extract
– 1 cup white chocolate or vanilla frosting
– Green sprinkles (for decoration)
– Red icing (for decoration)
How to Make Homemade Little Debbies Tree Cakes?
1. Preheat your oven to 350°F (175°C). Time to get those warm, cozy vibes going!
2. Grease and flour your tree-shaped cake molds. Seriously, don’t skip this step; no one wants a stuck cake!
3. In a large bowl, whisk together the flour, baking powder, and salt. Set it aside like it’s nothing special.
4. In another bowl, cream together the softened butter and sugar until it’s light and fluffy. This should take about 3 minutes—get in there with those arms!
5. Beat in the eggs one at a time, then mix in the vanilla extract like a pro.
6. Gradually add the flour mixture and milk, alternating between the two while mixing until just combined.
7. Carefully pour the batter into your prepped molds, filling them about 2/3 full.
8. Bake for 25-30 minutes or until a toothpick inserted into the center comes out clean. Let them cool completely before removing them from the molds!
9. Once cool, slice the cakes in half horizontally. Spread a generous layer of sweet cream filling in the middle and pop the tops back on!
10. Frost the entire outside of the tree cakes with white chocolate or vanilla frosting. A little thicker equals a better coating!
11. Now, it’s sprinkle time! Cover the frosted cake with green sprinkles, making sure every part is covered in festive cheer.
12. Finally, use your red icing to draw on decorations. Be as fancy or as goofy as you like – no one’s judging in the name of fun!
Snack Time – Tips and Variations
I can hardly wait for you to try these! Here are some additional tidbits to play around with:
– **Flavor Variations:** You can swap the vanilla extract for almond or peppermint extract for a fun twist!
– **Filling Options:** If you want a flavor surprise, try a layer of strawberry jam in addition to your cream filling!
– **Storage:** These beauties can be stored in an airtight container at room temperature for up to 3 days – but believe me, they won’t last that long!
I’m just so thrilled for you to bring a little bit of holiday magic to your kitchen with these Homemade Little Debbies Tree Cakes. Whether it’s for a festive gathering or just a treat for yourself, I hope they bring you as much joy as they have brought me. Please do share your experience with me – I’d love to hear how they turn out! Happy baking!


