Chocolate Peanut Butter Dream Bars
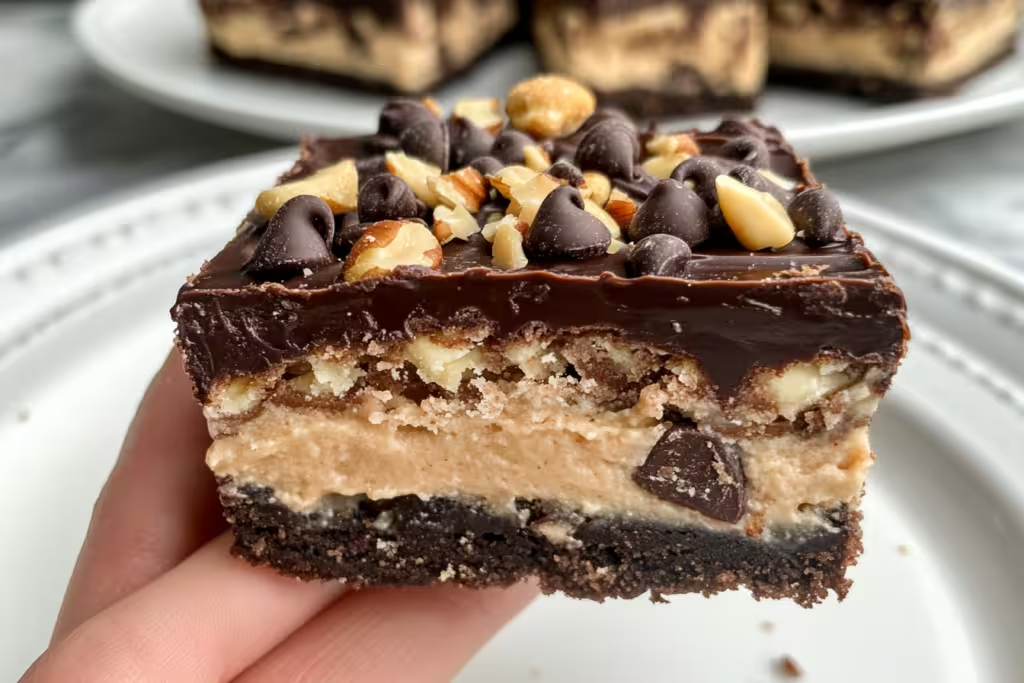
Oh, let me tell you about these **Chocolate Peanut Butter Dream Bars**! They have a magical way of finding their way into my heart (and stomach) every time I make them. I stumbled upon this recipe during a desperate late-night cookie craving, and I thought, “Why not elevate my snacking experience with peanut butter and chocolate?” Little did I know, I was about to embark on a deliciously decadent journey that would lure friends and family into a sweet, gooey dreamland they wouldn’t want to leave! It’s 100% impossible to share these without people begging for the recipe—and who could blame them? These bars are the ultimate treat, packed with flavor and, let’s be honest, a generous helping of nostalgia.
Now, I’m sure we all have that one indulgent recipe that reminds us of our childhood—maybe it’s the peanut butter cookies grandma used to make? Well, these bars awaken that feeling in me, but with the added bonus of chocolate! So let’s get baking, shall we?
What’s in Chocolate Peanut Butter Dream Bars?
– **1 package (12 oz) peanut butter sandwich cookies**: These delicious cookies create the most scrumptious base! You can use any generic brand, but I’ve found that those classic peanut butter ones from *Nabisco* are my go-to. They’re perfectly sweet and crumbly.
– **1/2 cup unsalted butter, melted**: Butter makes everything better! Unsalted allows us to control the saltiness of our sweet treat—plus it helps bind those cookie crumbs into a delightful crust.
– **1 cup creamy peanut butter**: The heart and soul of this recipe! I always reach for *Jif* or *Skippy*—smooth, rich, and full of that nutty flavor we can’t resist.
– **1 cup powdered sugar**: This gives our filling that delightful sweetness and fluffy texture. Just make sure it’s fresh; nothing ruins a dream faster than stale sugar!
– **1 cup heavy cream**: Whipping cream provides that luscious creaminess. Check out *Land O’Lakes* for a rich, decadent option that’s always a crowd-pleaser.
– **1 tsp vanilla extract**: A splash of this adds depth and warmth. Go for pure vanilla extract if you want to treat yourself right!
– **1 cup semi-sweet chocolate chips**: These little gems are what dreams are made of! You can’t go wrong with *Ghirardelli*—they melt beautifully and bring a perfect chocolatey contrast.
– **1/2 cup chopped nuts**: Think peanuts or almonds—whatever you fancy! They add that nice crunch to the bars. I lean toward salted peanuts for that sweet-and-salty dynamic.
– **Additional chocolate for drizzling (optional)**: Who doesn’t love extra chocolate? Feel free to go wild and drizzle as much as your heart desires!
Is Chocolate Peanut Butter Dream Bars Good for You?
Ah, the million-dollar question! While I wouldn’t quite call these bars “health food,” there are indeed some redeeming qualities to be found here.
– **Peanut Butter**: This ingredient is a great source of protein, which helps keep you full and satisfied. It’s also rich in healthy fats, making it an excellent addition to your diet—just in moderation, of course!
– **Chocolate**: Dark chocolate (if you choose that for drizzling) packs in some antioxidants and heart-healthy benefits without being overly sweet. But, I’ll just say, “Everything in moderation”—too much of a good thing can raise those sugar levels quickly.
But let’s keep it real! These bars are a dessert-centric delight, so enjoy them as a treat and balance your delicious indulgence with other health-conscious choices throughout the day!
Ingredients List
– **1 package (12 oz) peanut butter sandwich cookies**
– **1/2 cup unsalted butter, melted**
– **1 cup creamy peanut butter**
– **1 cup powdered sugar**
– **1 cup heavy cream**
– **1 tsp vanilla extract**
– **1 cup semi-sweet chocolate chips**
– **1/2 cup chopped nuts (such as peanuts or almonds)**
– **Additional chocolate for drizzling (optional)**
How to Make Chocolate Peanut Butter Dream Bars?
1. **Prepare the Cookie Base**: Preheat your oven to 350°F (175°C). (Don’t skip this step—nobody likes a soggy base!) In a food processor, grind the peanut butter sandwich cookies into fine crumbs. Mix those crumbs with the melted butter until it’s all combined and looks like wet sand. Press this mixture firmly into the bottom of a greased 9×9 inch baking pan.
2. **Bake the Base**: Pop that crust into your preheated oven for about 10 minutes, or until it starts to turn a lovely golden color. Once done, take it out and let it cool completely—patience is a virtue here!
3. **Make the Peanut Butter Filling**: In a mixing bowl, mix together the peanut butter, powdered sugar, heavy cream, and vanilla extract. Beat these ingredients with an electric mixer until everything becomes smooth and creamy—about 2 to 3 minutes.
4. **Spread the Filling**: Once your cookie base is cool, go ahead and spread that luscious peanut butter filling evenly over it.
5. **Add Toppings**: Top the creamy filling with the chocolate chips and chopped nuts, pressing them down gently so they don’t just roll off when cut.
6. **Chill**: Cover the baking dish with plastic wrap and toss it into the fridge for at least 2 hours. This step helps firm up the filling and makes for easier cutting later!
7. **Drizzle Chocolate**: If you’re feeling fancy, melt some extra chocolate and drizzle it over the top of your chilled dessert. Grab a spoon or a piping bag for a professional finish—impress your family with your “culinary finesse”!
8. **Serve**: Finally, cut your dream bars into portions and serve chilled. Watch as people dive in and savor the contrast of textures—it’s all about that crumbly base, fluffy filling, and chunky toppings!
Sweet Notes from My Kitchen
– For a sprinkle of sophistication, you can add a pinch of sea salt on top of that melted chocolate drizzle—a perfect sweet-and-salty combo!
– These bars keep well in the refrigerator for up to a week, but I promise you they won’t last that long. They’re best enjoyed cold, and I can guarantee I’ll be snagging one (or two) each time I walk by the fridge!
I encourage you to give these **Chocolate Peanut Butter Dream Bars** a try. They’re a guaranteed crowd-pleaser and perfect for any gathering or just a cozy night in. When you do, let me know how they turn out! I’d love to hear about your adventures in the kitchen and any fun twists you add. Happy baking! 🍫🥜


